Breadboard
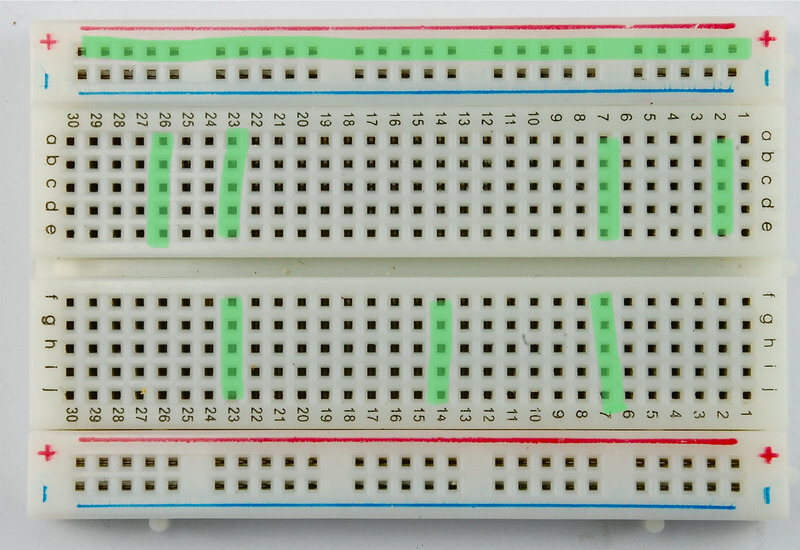
Here you can see a Breadboard. The thing with Arduino is, that you can connect lots of stuff (sensors, lights, motors etc) in Arduino. A breadboard makes it easier. You do your own circuit board, but you don’t need soldering iron.
It’s important you to know wich lines are connected with each other at the breadboard. The green lines (in the picture below) indicates all lines that are connected. For example, plug +(positive) wire from Arduino into ”+line”and the whole line is now positively charged. You can pick it anywere from the line with another wire.
The center lines (a, b, c, etc.) are all connected vertically. Notice the cut in the very center: it divides the breadboard as half. The halves are not connected with each other unless you use wires.
